We use cookies to make your experience better. To comply with the new e-Privacy directive, we need to ask for your consent to set the cookies. Learn more.
Manuals
-
- February 14, 2024
To launch the El-print application on MacOS, you should follow several steps.
- Unzip the downloaded archive with the application.
- Launch the application by double-clicking the mouse.
- The application will not open due to the security system.
- Then follow these steps
-
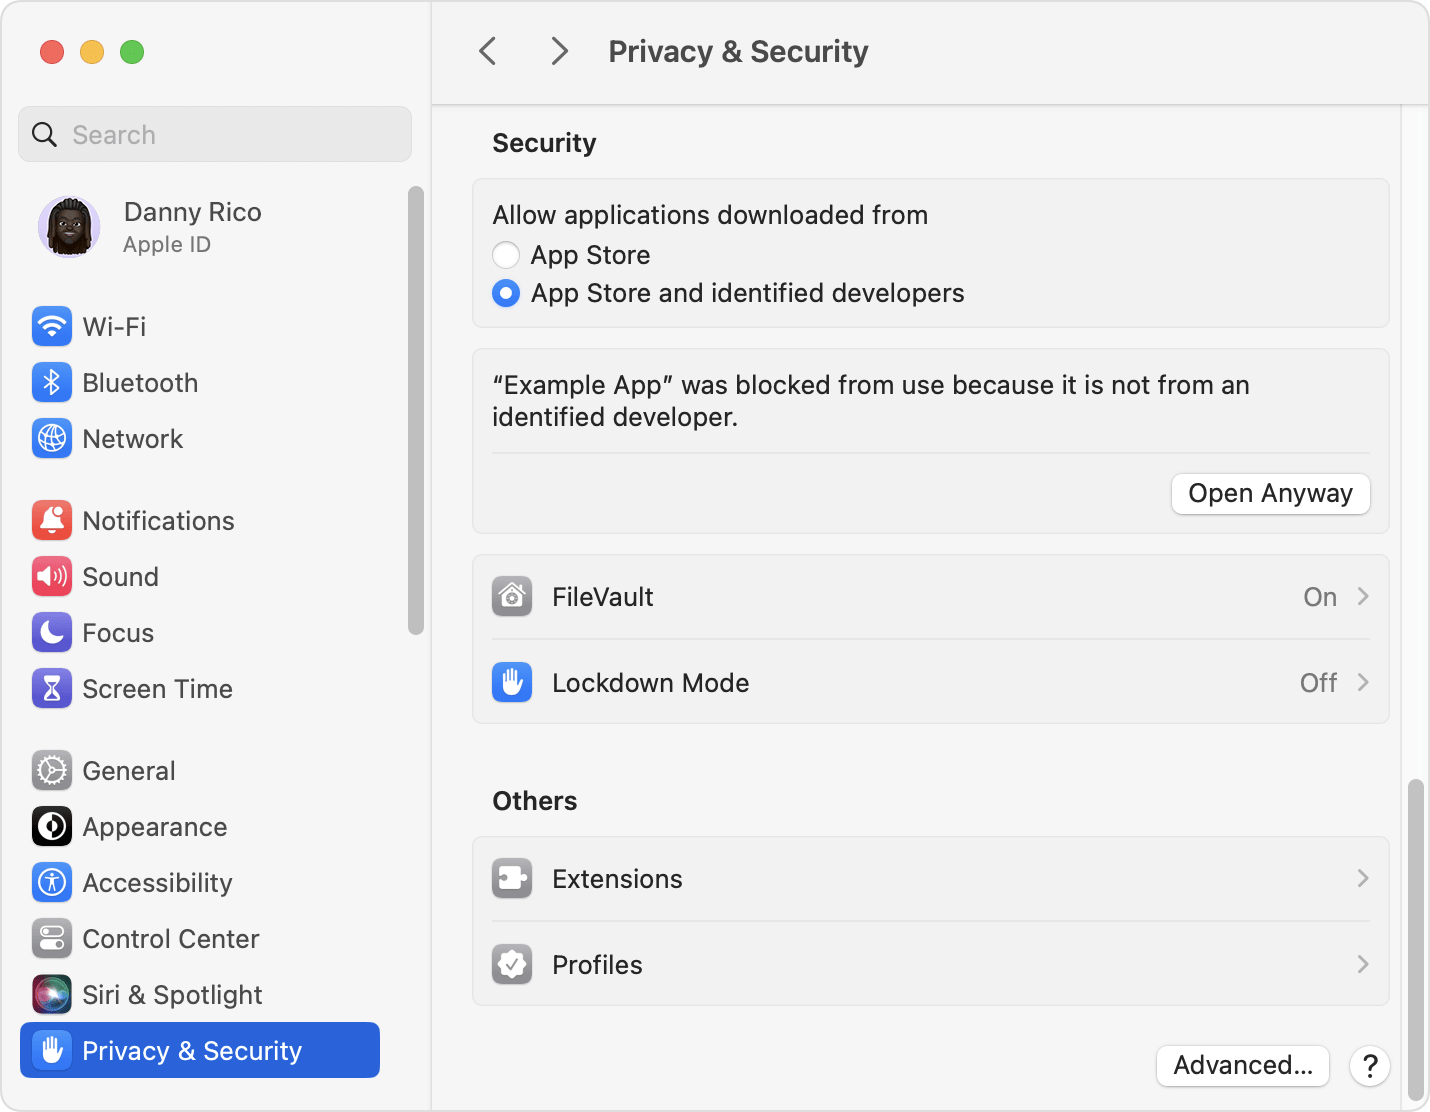
Open System Settings.
-
Click Privacy & Security, scroll down, and click the Open Anyway button to confirm your intent to open or install the app.
-
The warning prompt reappears and, if you're sure that you want to open the app anyway, you can click Open.
- The app is now saved as an exception to your security settings, and you can open it in the future by double-clicking it, just as you can any authorized app.
-
-
- December 04, 2023
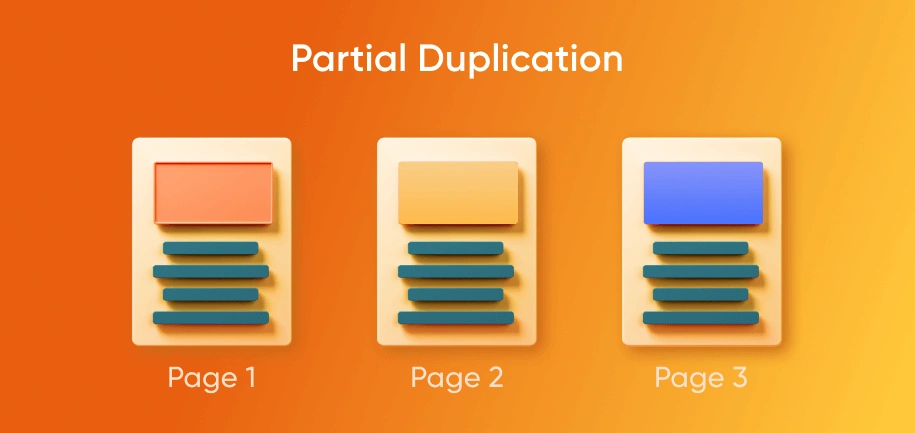
What types of duplicate content exist in Magento, and what are the most prevalent examples? Partial duplicates refer to instances where only a small portion of the content or its layout is distinct.
Below are the typical instances of partial duplicates found in Magento stores, each link providing a detailed overview upon clicking:
- Products Sorting
- Pagination
- Variations of the Same Product
The primary example of full duplicates in Magento is having an identical product listed in multiple categories.
A canonical URL in Magento 2 is a designated web address selected as the 'preferred' one for search engine indexation. It helps address the issue of duplicate or highly similar content across different pages. The Magento 2 canonical tag, often referred to as an HTML attribute, is applied to web pages to guide search engines in determining the primary source of content and assigning search value.
For instance, consider multiple pages for the same product:
- example.com/dresses/blackzaradress.html
-
- November 15, 2023
Introduction:
In the ever-evolving landscape of online commerce, security is paramount. As a Magento 2 store owner, you know the importance of safeguarding sensitive information and ensuring a secure shopping environment for your customers. One powerful tool in your security arsenal is Two-Factor Authentication (2FA). To streamline the management of this crucial security feature, we recommend implementing a solution that enables administrators to effortlessly toggle 2FA settings directly from the Magento 2 admin panel.The Need for Two-Factor Authentication:
Two-Factor Authentication adds an extra layer of security by requiring users to verify their identity using two distinct factors: something they know (like a password) and something they have (such as a mobile device). While Magento 2 inherently supports 2FA, making it easily manageable from the admin panel takes security to the next level.The Solution:
We've discovered a robust solution that empowers administrators to enable or disable -
- October 21, 2023
Introduction:
Running an e-commerce store on Magento 2 is a powerful and flexible solution, but managing the backend can sometimes feel like navigating a labyrinth. Important tasks often require you to dig deep into the menu structure, resulting in time wasted searching for the right configuration options. However, there's a solution to this common problem – the Magento 2 Hotlinks Menu module. In this article, we'll explore how this module can significantly improve your efficiency in the admin panel.
The Need for Quick Access in the Admin Panel
The complexity of the Magento 2 admin panel is a double-edged sword. While it offers incredible customization and control, it can be challenging to find your way around quickly. Often, you need to change specific settings frequently, like configuring payment methods under "Sales -> Payment Methods." This is where the Hotlinks Menu module comes to the rescue.
Introducing the Hotlinks Menu Module
The Hotlinks Menu module is a valuable tool that simplifies
-
- October 21, 2023
Introduction:
Managing an e-commerce store can be a complex task, but it becomes much smoother when you have the right tools at your disposal. One such tool that can transform the way you handle products, orders, invoices, and shipments is the advanced filtering system seamlessly integrated into our Magento 2 Ready-Made Admin Wizard extension. In this article, we will explore how advanced filters give you unparalleled control and flexibility over your e-commerce operations.
Understanding Advanced Filters
Advanced filters are a game-changer, enabling you to implement conditions that follow a logic similar to price rules. These filters are seamlessly integrated into your product, order, invoice, and shipment management processes, all included in our comprehensive Admin Wizard extension. They allow you to take a more granular and precise approach to managing your store's data.
Advanced Filters for Products
When applying conditions to product filters, your system evaluates specific criteria
-
- October 21, 2023
Introduction:
Running a smooth and efficient e-commerce operation requires not only a powerful admin panel but also the ability to track and manage all changes made by administrators. That's where the "Action Logging" feature within our Magento 2 Admin Wizard extension comes into play. In this article, we'll explore how this feature allows you to maintain control, track admin actions, and restore any unintentional alterations to your store.
Understanding Action Logging
Action Logging is your trusty sidekick when it comes to tracking every move within your admin panel. With this feature integrated into Admin Wizard, you can maintain an organized and detailed record of all admin actions, making it easier than ever to identify who made changes and when those changes occurred.
Why Action Logging Matters
There are several reasons why Action Logging is invaluable for your e-commerce store:
Accountability: In a multi-administrator environment, accountability is key. Action Logging ensures that
-
- October 03, 2023
Add Featured Products to Magento Homepage with Page Builder
- Log in to the Magento Admin Panel: Log in to the administrative panel of your Magento installation.
- Navigate to the Homepage: In the admin panel, select "Content" > "Pages." Choose the homepage you want to edit and proceed to edit it.
- Edit the Homepage Using Page Builder:
- Click the "Edit with Page Builder" button to enter the editing mode using Page Builder.
- Create a New Block or Edit an Existing One:
- To add a block with products to the homepage, select the location where you want to insert the block and click "+ Add Content."
- Add the Product Block:
- From the available blocks, choose "Product List."
- Configure the Product Block:
- In the settings of the "Product List" block, you'll be able to select the category from which products will be displayed. Choose the "Featured Products" category or another as needed.
- You can also configure the number of displayed products and other block parameters.
- Save and Publish the Page:
- After configuring
-
- October 02, 2023
Step 1: Install and Configure Language Packs
Install Language Packs:
Go to your Magento Admin Panel.
Navigate to "Stores" -> "Configuration" -> "General" -> "Locale Options."
In the "Locale" section, select the language you want to add and save the settings.
Repeat this process for each language you want to support.
Step 2: Create Translations
Create Translations:Magento allows you to create translations for various parts of your store, such as button labels, product descriptions, and more.
Create CSV files for each language, e.g., en_US.csv for English and fr_FR.csv for French.
Upload these files to the directory app/i18n/[Vendor]/[theme]/i18n/, where [Vendor] is your theme provider and [theme] is your theme name.
Step 3: Configure Stores and Websites
Create Websites:Go to "Stores" -> "All Stores."
Click "Create Website" and name your new website, e.g., "English Website."
Create websites for each language you plan to support.
Create Stores:Under "All Stores," click "Create Store."
Select -
- September 23, 2023
Setting up taxes in Magento can be a complex process, as it depends on various factors such as your location, your customers' locations, the types of products you sell, and the tax regulations in your jurisdiction. Here is a general overview of how to set up taxes in Magento:
-
- September 23, 2023
- Use Constructor Injection: Always inject dependencies through constructors. Magento 2 encourages constructor injection over method injection for better code maintainability and testability.
public function __construct(
\Vendor\Module\Model\SomeModel $someModel,
\Vendor\Module\Helper\Data $helper
) {
$this->someModel = $someModel;
$this->helper = $helper;
}
- Type Hint Dependencies: Type hint your constructor parameters to specify the class/interface that the dependency should be. This helps with code readability and IDE autocompletion.
- Avoid Using Object Manager Directly: Do not use the Object Manager directly to create objects. Instead, rely on constructor injection or factory methods provided by Magento.
// Avoid
$object = \Magento\Framework\App\ObjectManager::getInstance()->get('SomeClass');
// Prefer
public function __construct(\Vendor\Module\SomeClassFactory $someClassFactory) {
$this->someClassFactory = $someClassFactory;
}
- Use Factories for Object Creation:
- Use Constructor Injection: Always inject dependencies through constructors. Magento 2 encourages constructor injection over method injection for better code maintainability and testability.